Log In
Log In

Vol-084 Fuchsia Flower Fairy String Lights Decor Earrings Beads and Jewelry

- +
Add To Cart
Sold Out

INTRO VIDEO

LED Light Strings Decorated With Translucent Polymer Clay Flowers

<iframe src="https://player.vimeo.com/video/125510126?app_id=122963" width="480" height="270" frameborder="0" allow="autoplay; fullscreen" allowfullscreen></iframe>

In this 6 part video tutorial series, you will learn how to mix your own custom polymer clay colors, cut and shape the most delicate and realistic fuchsias, torch your own flame dipped rosy headpins and string them all together on a strand of LED Fairy Lights to create a super pretty decor accent for your home or office space. You’ll also be able to create stunning fuchsia beads that can be used in jewelry projects such as earrings and pendants. There is a ton of great info in this tutorial that you are just going to love!

Unreal. Such a great idea!!! How cool is this? Morning glories. Or your Sweet Peas, climbing a trellis.


~Jocelyn-C


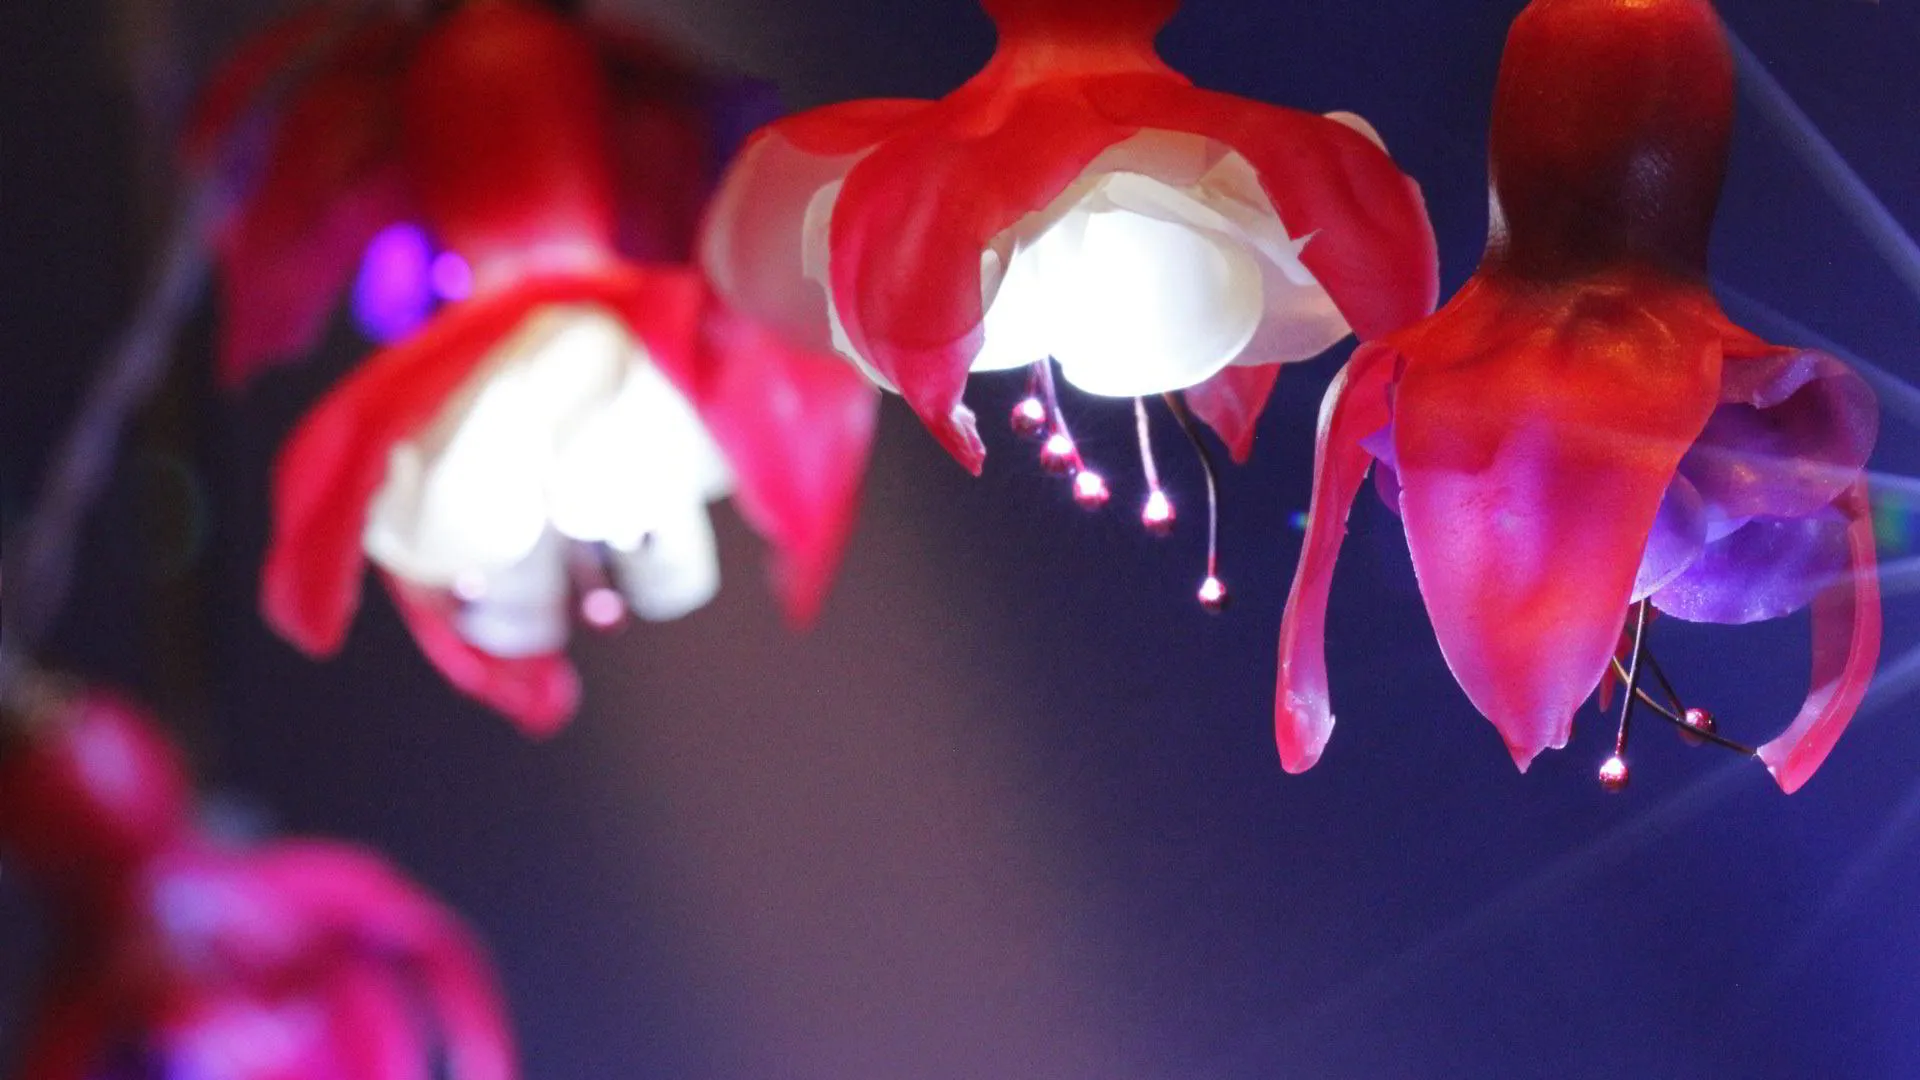
Fabulous, fantastic, Fuchsias looking just like a fairy ballerina. Love this tute Cindy and for once I have all the supplies including my LED lights, to start making them straight away. Fuchsias are one of my favourite flowers and come in such beautiful two tone colours. So will get conditioning my clay right now......... cheers!


~Elaine-F


Dear Cindy, Thank you soooo much for your wonderful videos!!! You are amazing. They are so easy to follow. I especially loved this one, because I have always wanted to know how to do the torch work. It is surprisingly easy to do. Thanks to you :) I am one HAPPY GIRL.


~Rosalyn-H


Hi Cindy & Doug, This is one of the neatest tutorials and I just squealed with delight when I saw ho you were using the LED'S. Oh the possibilities! I made a whole bouquet of Fuchsia flowers last year but never would have thought to add these tiny little lights. Excited all over again! So pretty strung in different areas of my studio! 


~DixieAnn-S


Another Super Duper tute! My Dad used to grow Fuchsias. They are so dainty. I do want to add other flowers too... now to find the time to play. Thank you so much for all your talent, time, and energy! So glad I belong to your family.


~Patt-W


Thank you so much Cindy and Doug, what a fabulous tutorial! And a special thank you for showing us how to make the 'stamens', I've always been nervous of wire work with a torch, but I'm ready now to give this a go! 


~Marion-R


I love the Fuchsia lights! You are so creative! 


~Tammy-O


I can only say WOW!!! I've been pondering a similar project for a while now .... so I'm super excited about this tutorial. Thank you so much, Cindy and Doug, as always! And for anyone thinking about signing up ..... really, it's a no-brainer! :-)


~Lesley-S


I unearthed a strand of led fairy lights from my box of Christmas decorations, so glad you showed how they look strung on every OTHER one. The idea of using these pretty flowers on fairy lights is very special. They will adorn my stall in the marquee at Abridge Village Craft and Antiques fair.


~Elaine-F


Hello Cindy. I just wanted to say that I love how your videos are quick and to the point. You can get through them very quickly and start practicing the techniques right away. Thank you.


~Nanette-B


YES!!!! (punching the air). You made the fuchsia flowers!!!! I can't say how happy I am! I wanted to know how to build this flower for years and I was always on the lookout for tutorials. Loooooove it! Thank you, thank you, thank you!!!!!!


~Helena-B


Hi Cindy, I have now watched several of your excellent videos and wanted to I thank you for speaking directly to me in your videos, at least that's the way you make me feel.


~Nancy-B


Very cool idea! I am not a Fuchsia fan, but I will try this with some other flowers. I think Plumeria or Jasmine on tiny tiny lights would be neat. Or fantasy flowers on tiny lights set around the rim of a tea cup planter with a faery world that includes a faery door. So many ideas, not nearly enough clay, and even LESS TIME!!


~Doreen-N


Tools Supplies

  • Acrylic Roller (or Pasta Machine)
  • Clay Blade
  • Mini Light Strand
  • Graduated Round Cutters (Or Exacto Knife)
  • Graduated Teardrop Cutters (Or Exacto Knife)
  • Ball Stylus like Sculpey Style and Detail Tools
  • Masking Tape or Floral Tape (In same color as light strand)
  • Small Dowels, Skewers or Knitting Needles
  • Balled Headpins (Or make your own with the following tools)
  • Propane Torch Head
  • Small Propane Canister
  • 24 Gauge Copper Wire
  • Flush Cutters
  • Lighter or Flint Stricker
  • Polymer Clay (I used... Premo White Translucent, Pearl, Purple, Pomegranate, Fuchsia)
  • Foil Pan partially filled cornstarch with a foil lid
  • Oven Thermometer


Nice To Have Items


  • Pasta Machine
  • Round Nose Jewelry Pliers
  • Chain Nose Jewelry Pliers
  • Renaissance Wax
  • Glass Mat
  • Heat Gun

Resource links to products listed above, will be included when you buy this tutorial.

Related products


14720 - 60 Avenue, Surrey, BC, Canada, V3S-1R7 • 360-746-2093 • Copyright © 2007-2021 All Rights Reserved

Your cart is empty Continue
Shopping Cart
Subtotal:
Discount 
Discount 
View Details
- +
Sold Out